DNS Spoofing
In this section, we will learn about DNS servers. DNS is basically a server that converts the domain name to the IP address of the device. We can convert the domain name like www.google.com to the IP addresses of the device where the Google website is stored. Since we are the MITM, we can have a DNS server running on our computer and resolve DNS requests the way we want. For example, whenever a person requests to Google.com, we can actually take them to another website, because we are in the middle. So, when someone requests it, we will actually give them an IP that we want, and then they will see a completely different website than what they are expecting. So, we can have a fake website running on our server and get requests, for example, from xyz.com to that website.
To do this attack, the first thing we will do is redirect people to our web server. The web server is going to be run on our local Kali machine. We can redirect the people anywhere we want. But in this section, we are going to redirect them to our local webserver. To do this, we will start the Apache webserver. It comes preinstalled with the Kali machine, so all we have to do is run the following command, and after this, the webserver will start:
The file for the webserver is stored in the /var/www/HTML directory. We are going to open the file manager, and we are going to go to the /var/www/HTML directory. Now, if we browse our web server, the following page will be displayed as shown in the given screenshot:

In the above image, we can see a whole complete website installed here, and it will be displayed whenever a person visits our web server. If we go to the browser and browse 10.0.0.11, which is our IP address, we will see the index.html page there.
Now let's configure the DNS server that comes in with MITMf. To do that we are going to use the LeapPad which is the text editor. Then we are going to run the following command:

After executing this command, we are going to scroll down to where the A records are, as seen in the following screenshot. Records are basically the records that are responsible for transforming or translating domain names to IP addresses:

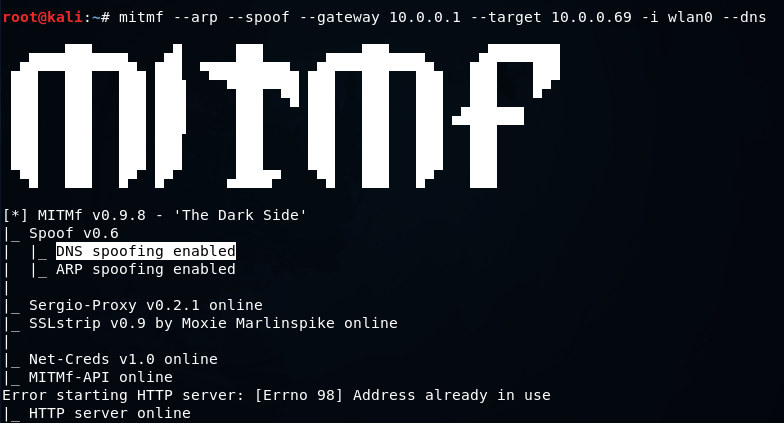
We are going to be targeting xyz.com and using the * as a wildcard. So, basically, we are saying any subdomain to xyz.com should be redirected to our IP address which is 10.0.0.11. If we want to replace this, we can do this with any IP address, for example, we can redirect it to Google by putting the IP of Google. Any IP we put here will redirect xyz.com. Now save the file and close it, and we are going to run our command. The following command is very similar to the command that we were running before in the previous sections. The only difference is we are going to add one extra option which is --DNS. The command is as follows:

In the above screenshot, we can see that DNS spoofing is enabled. Now let's go to the target and try to go xyz.com and see what happens. In the following screenshot, we can see that xyz.com is redirected to our website, which displays some simple text. But if we want, we can install anything. We can ask them to download something, or we can have a fake page, steal stuff, and steal credentials:

It can also be used to serve fake updates to the target person. There are so many uses to DNS spoofing. This is the basic way to do DNS spoofing, and then we can use it and combine it with other attacks or with other ideas to achieve really powerful attacks.


0 Comments